Wikipedia:Graphics Lab/Photography workshop/Archive/Feb 2015 Source: en.wikipedia.org/wiki/Wikipedia:Graphics_Lab/Photography_workshop/Archive/Feb_2015
Huygens
[edit]
- Article(s)
- Huygens
- Request
- please trim to page… -- Kintetsubuffalo (talk) 05:33, 1 February 2015 (UTC)
- Graphist opinion(s)
 Done - Fallschirmjäger ✉ 17:20, 1 February 2015 (UTC)
- Better, thank you!--Kintetsubuffalo (talk) 13:38, 6 February 2015 (UTC)
Rowland_Hill
[edit]-
 Original
 -
 Crop
Crop -
 Signature


- Article(s)
- Rowland_Hill
- Request
- please separate photo and signature… -- Kintetsubuffalo (talk) 02:17, 8 February 2015 (UTC)
- Graphist opinion(s)
- Done - Cropped the photo and also SVG version of the signature. Fallschirmjäger ✉ 12:23, 8 February 2015 (UTC)
- Fantastic, thank you!--Kintetsubuffalo (talk) 11:06, 11 February 2015 (UTC)
Sista dansen
[edit]
- Article(s)
- Sista dansen
- Request
- Has watermark. -- George Ho (talk) 02:47, 8 February 2015 (UTC)
- Graphist opinion(s)
- Done - Fallschirmjäger ✉ 11:34, 8 February 2015 (UTC)
Carthamus tinctorius
[edit]
- Article(s)
- Carthamus tinctorius
- Request
- please center and reduce shading and warp… -- Kintetsubuffalo (talk) 05:50, 8 February 2015 (UTC)
- Graphist opinion(s)
![]() Done Carl Henderson (talk) 05:09, 31 July 2015 (UTC)
Done Carl Henderson (talk) 05:09, 31 July 2015 (UTC)
Rotate and crop
[edit]-
 Badly tilted photo; rotate only
 -
 Badly tilted photo; rotate only
 -
 Crop, to remove my car's mirror at bottom right


- Request
- Just need rotation for two images and cropping for the third. -- Nyttend (talk) 17:53, 9 February 2015 (UTC)
- Graphist opinion(s)
 Request taken. - Fallschirmjäger ✉ 18:59, 9 February 2015 (UTC)
- Done - Fallschirmjäger ✉ 19:12, 9 February 2015 (UTC)
- Thanks! Nyttend (talk) 19:41, 9 February 2015 (UTC)
Lothar von Trotha
[edit]_Oberstleutnant_L%C3%B6thar_von_Trotha.jpg)
- Article(s)
- Lothar von Trotha
- Request
- please fix lozenging and remove border… -- Kintetsubuffalo (talk) 02:43, 11 February 2015 (UTC)
- Graphist opinion(s)
![]() Done Lozenging (moire) reduced as requested. Note: not a lot of improvement was possible from the low rez, highly-moired original. Carl Henderson (talk) 05:21, 31 July 2015 (UTC)
Done Lozenging (moire) reduced as requested. Note: not a lot of improvement was possible from the low rez, highly-moired original. Carl Henderson (talk) 05:21, 31 July 2015 (UTC)
Varro
[edit]
- Article(s)
- Varro
- Request
- please remove border and contrast better… -- Kintetsubuffalo (talk) 11:05, 11 February 2015 (UTC)
- Graphist opinion(s)
![]() Done MjolnirPants Tell me all about it. 15:21, 11 February 2015 (UTC)
Done MjolnirPants Tell me all about it. 15:21, 11 February 2015 (UTC)
- Thank you!--Kintetsubuffalo (talk) 16:53, 11 February 2015 (UTC)
Hebron Church
[edit]-
 Main façade of Hebron Church
 -
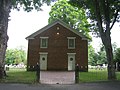 Main façade of Hebron Church


- Article(s)
- Hebron Church
- Request
- I will be completing an article for Hebron Church within the next day or so, and would like to use these images as the main images. However, these images were taken in the shade. I was wondering if these images could be sharpened and lightened slightly so that the brick façade can be shown more clearly. Any improvements to these images would be of the utmost help! These images will also be used in the DYK nomination, so hopefully one of them will show on the front page! Thank you to the graphists for all your hard work and dedication. There are other images -- Caponer (talk) 15:36, 11 February 2015 (UTC)
- Graphist opinion(s)
@Caponer: Overall I find that these images are fine the way it is. Looking at the background, I could see that either the photo was overexposed or the clouds were very bright. I tried editing these images, tweaking specifically levels (I also tried brightness and contrast) and it made a little difference that IMO makes no difference. If you want a better image showing the brick facade see this on Flickr or his related uploads of the same church. ///EuroCarGT 21:50, 20 February 2015 (UTC)
- Thanks EuroCarGT! That image you found on Flickr is also on Wikimedia Commons. I just liked the two here because of their scale. Thank you for your edits! They indeed look great and I'll be finishing this article soon! Thanks again! -- Caponer (talk) 13:31, 22 February 2015 (UTC)
Pedro I of Brazil
[edit]
- Article(s)
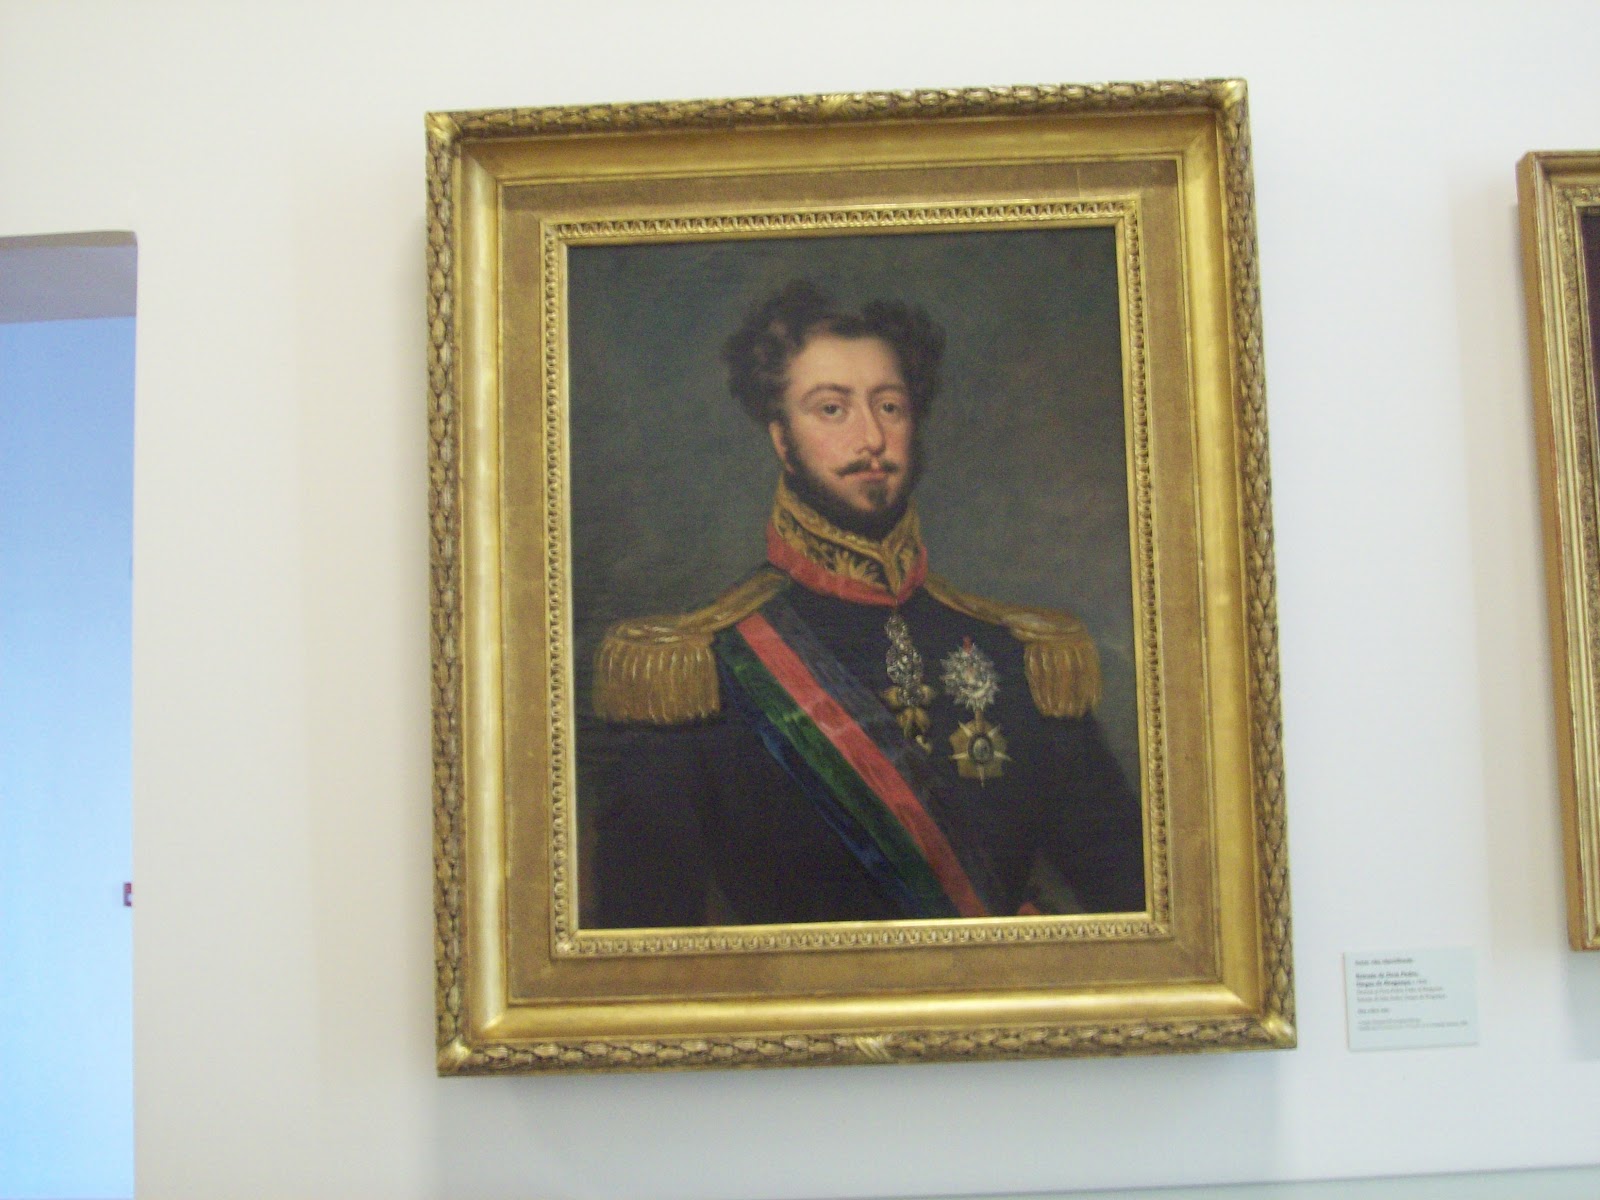
- Pedro I of Brazil
- Request
- This is highly detailed version of a portrait of Emperor Pedro I of Brazil. The problem is that it's not true to the actual portrait as you can see here, here and here. Could someone fix that? Please, do not overwrite the previous version. Create a new file for it. Thanks, -- Lecen (talk) 18:59, 11 February 2015 (UTC)
- Graphist opinion(s)
- I checked out the images you posted, and I'm not seeing the difference. What exactly did you want changed? MjolnirPants Tell me all about it. 22:03, 11 February 2015 (UTC)
- The links meant to show difference aren't actually the same painting, at least in the first two cases. They aren't any evidence of problems whatsoever. Adam Cuerden (talk) 23:33, 11 February 2015 (UTC)
Methodist chapel
[edit]-
 Methodist chapel in Chellaston

- Article(s)
- Methodist Church of Great Britain
- Request
- Please remove the red date from the bottom-right of the photograph. It is not important that the sign in the image should be readable, so feel free to blur the photograph slightly. -- HazhkTalk 11:59, 13 February 2015 (UTC)
- Graphist opinion(s)
- Done - Fallschirmjäger ✉ 17:02, 13 February 2015 (UTC)
- That's the obvious solution (no photoshop skills needed there). I had assumed it would be very easy to remove the timestamp without just cropping the bottom of the image, but I guess since nothing important has gone from the image... Thanks. -- HazhkTalk 18:14, 13 February 2015 (UTC)
- Sorry I'm not following you, I didn't crop the image, I removed only the timestamp in PS as requested? You sure you're seeing the latest version, may need to purge. Regards, Fallschirmjäger ✉ 22:46, 13 February 2015 (UTC)
- I'm really sorry, I didn't check closely! Yes, I see you have edited the timestamp out. Thanks very much!! And additional thanks for lightening the image. --HazhkTalk 23:17, 13 February 2015 (UTC)
- No problem, your welcome :) Fallschirmjäger ✉ 00:22, 14 February 2015 (UTC)
- I'm really sorry, I didn't check closely! Yes, I see you have edited the timestamp out. Thanks very much!! And additional thanks for lightening the image. --HazhkTalk 23:17, 13 February 2015 (UTC)
- Sorry I'm not following you, I didn't crop the image, I removed only the timestamp in PS as requested? You sure you're seeing the latest version, may need to purge. Regards, Fallschirmjäger ✉ 22:46, 13 February 2015 (UTC)
- That's the obvious solution (no photoshop skills needed there). I had assumed it would be very easy to remove the timestamp without just cropping the bottom of the image, but I guess since nothing important has gone from the image... Thanks. -- HazhkTalk 18:14, 13 February 2015 (UTC)
Crop request
[edit]-
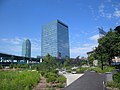 Gotham Center
 -
 Cropped and straighten

.jpg)
- Request
- Could someone please crop the building in the center? (As a new image.) I believe its Two Gotham Center, which seems to be the NYC Department of Health's main operations building, e.g., this is where they hold many meetings of the New York City Board of Health. Pretty please and thank you, as always. -- Int21h (talk) 21:16, 16 February 2015 (UTC)
- Graphist opinion(s)
![]() Done ///EuroCarGT 21:36, 17 February 2015 (UTC)
Done ///EuroCarGT 21:36, 17 February 2015 (UTC)
As the thoughtless photographer who didn't know what he wanted in composing the picture, I thank you. Jim.henderson (talk) 14:09, 19 February 2015 (UTC)
- Thanks to you both. And sorry for forgetting to mark it as resolved. Int21h (talk) 01:38, 20 February 2015 (UTC)

- Article(s)
- Anput
- Request
- Neutral background (white or black), please
- Just for fum, another version: [1] -- Pete Tillman (talk) 19:50, 21 February 2015 (UTC)
- Graphist opinion(s)
- Done MjolnirPants Tell me all about it. 16:37, 24 February 2015 (UTC)
- Thanks! Big improvement. Cheers, Pete Tillman (talk) 01:20, 28 February 2015 (UTC)
Alberta politician photos
[edit]Can anyone pull off the workaround described here, to get un watermarked images from a certain site [ex. [2] ]. I can't seem to get this to work anymore...is there something I'm doing wrong, or have browser updates since then made it impossible to do? Planning on filling in some redlinks, but would prefer not to bog down this page with watermark removal requests. Connormah (talk) 23:55, 24 February 2015 (UTC)
- Note: In the instructions below,
this is text to look forand this is text to type.
- Note: In the instructions below,
- I just gave it a shot and it worked just fine. What you have to do is change
viewimage.aspxto getimage.aspx in the title bar and hit <Enter>. Leave the rest of the text in the title bar, including any slashes or periods alone. That should give you a page with a bunch of gibberish on it. On that page, clickFile -> Save Page As.... In theSave Filedialog box that opens up, at the bottom there will be a field markedSave as typedirectly under theFile namefield. You want to set that toAll Files (*.*)and then type [filename].jpg in theFile namefield, where [filename] is whatever you want to name it. Remember to type the .jpg part! After that, browse to where you save it and check it out. MjolnirPants Tell me all about it. 16:54, 25 February 2015 (UTC)- @MjolnirPants: - which browser are you using? My browsers won't let me save it as a jpg, that was the main problem. Connormah (talk) 07:12, 26 February 2015 (UTC)
- Firefox, here. As far as I know, both chrome and IE should let you do it as well, if you follow the steps above. The part about changing the file type is the most important. MjolnirPants Tell me all about it. 14:02, 26 February 2015 (UTC)
- @MjolnirPants: - there doesn't seem to be that option for me. I keep getting dialogues saying that I cannot save in jpg. Are you on an older version of the browser? Connormah (talk) 14:37, 26 February 2015 (UTC)
- Nope. 35.0.1 here. I'm not sure how that's not an option, are you on a linux or mac system? MjolnirPants Tell me all about it. 16:11, 26 February 2015 (UTC)
- This might help if you're on a windows machine.MjolnirPants Tell me all about it. 16:39, 26 February 2015 (UTC)
- @MjolnirPants: - I'm on a Mac - is there any way? (though I could use another computer to do this) Connormah (talk) 18:06, 26 February 2015 (UTC)
- @MjolnirPants: - there doesn't seem to be that option for me. I keep getting dialogues saying that I cannot save in jpg. Are you on an older version of the browser? Connormah (talk) 14:37, 26 February 2015 (UTC)
- Firefox, here. As far as I know, both chrome and IE should let you do it as well, if you follow the steps above. The part about changing the file type is the most important. MjolnirPants Tell me all about it. 14:02, 26 February 2015 (UTC)
- @MjolnirPants: - which browser are you using? My browsers won't let me save it as a jpg, that was the main problem. Connormah (talk) 07:12, 26 February 2015 (UTC)
@Connormah: I'm not sure. The last time I used a mac was for 10 minutes, about 3 years ago. Sorry. MjolnirPants Tell me all about it. 21:12, 26 February 2015 (UTC)
- @Connormah: I'm feeling a little silly now, for not mentioning this before. Have you tried saving it as a web page then manually changing the file extension to .jpg? I know that works on windows and linux machines. MjolnirPants Tell me all about it. 19:26, 4 March 2015 (UTC)
Hrithik Roshan
[edit]-
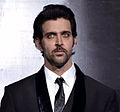 Hrithik Roshan

- Article(s)
- Hrithik Roshan
- Request
- Please make background complete black to remove commercial ads and for better image. -- Abhi (talk) 08:09, 27 February 2015 (UTC)
- Graphist opinion(s)
- I took a quick shot at it, and I have to say it looks rather ugly. Would it be acceptable to edit the logos out, instead? I've uploaded an example (revert if needed). MjolnirPants Tell me all about it. 15:52, 4 March 2015 (UTC)
- Perhaps my imagination with black background was wrong. Your uploaded image without logos is good one. Thanks ! Abhi (talk) 18:37, 4 March 2015 (UTC)
George Marshall
[edit]
- Article(s)
- George Marshall
- Request
- please straighten, make same size, remove background… -- Kintetsubuffalo (talk) 01:07, 28 February 2015 (UTC)
- Graphist opinion(s)
- Done - Fallschirmjäger ✉ 13:01, 28 February 2015 (UTC)
- Thank you!--Kintetsubuffalo (talk) 14:18, 28 February 2015 (UTC)
écu
[edit]
![[1]](https://s-media-cache-ak0.pinimg.com/736x/00/36/d3/0036d36066dc52021ee1edcb210597f1.jpg)
![[2]](https://hws.alberta.ca/getimage.aspx?img=PAA\Images\A2775.jpg)
- Article(s)
- écu
- Request
- please remove background… -- Kintetsubuffalo (talk) 14:39, 28 February 2015 (UTC)
- Graphist opinion(s)
- Done MjolnirPants Tell me all about it. 21:30, 2 March 2015 (UTC)
- Thank you so much!--Kintetsubuffalo (talk) 10:19, 3 March 2015 (UTC)